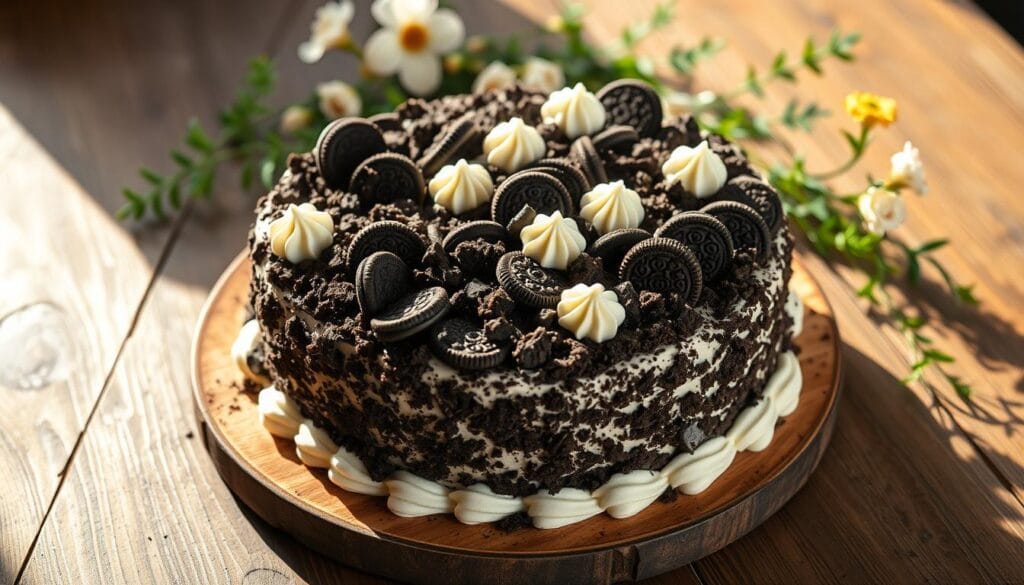
Oreo Dirt Cake Recipe

Childhood memories often taste sweet, and nothing captures that like an Oreo dirt cake. This no-bake treat turns simple ingredients into a fun dessert. It’s a playful mix of crushed Oreos, creamy pudding, and a garden of deliciousness.
The Oreo dirt cake is more than a recipe—it’s an experience. It takes just 20 minutes to prepare and needs no special cooking skills. It’s perfect for kids’ parties or when you want a whimsical treat. This dessert is all about having fun in the kitchen.
Introduction to the Classic Oreo Dirt Cake
Get ready to explore a world of Oreo dessert magic! The Oreo dirt cake is a playful, irresistible treat. It turns simple ingredients into a whimsical garden plot that tastes like pure indulgence.
Exploring the Delicious History
The dirt cake’s origins come from creative home bakers. They wanted to make a fun, memorable dessert. Inspired by the idea of mimicking soil and garden elements, it quickly became a hit at gatherings.
- Invented in the 1970s as a creative dessert concept
- Rapidly gained popularity in suburban American kitchens
- Became a staple at children’s birthday parties
Perfect for Every Celebration
This oreo dessert is incredibly versatile. It’s perfect for kids’ birthday parties, summer picnics, or family dinners. Its adaptable nature allows for endless creative presentations.
Preparation Overview
This layered dessert is surprisingly simple to make. With just 30 minutes of preparation, you can serve up to 20 people. The recipe is easy, making it perfect for both novice and experienced bakers.
| Preparation Time | Serving Size | Difficulty Level |
|---|---|---|
| 30 minutes | 20 servings | Easy |
Get ready to impress your guests with this delightful, Instagram-worthy dessert. It’s as fun to make as it is to eat!
Essential Ingredients for Your Oreo Dirt Cake
To make the perfect Oreo dirt cake, you need the right ingredients. Chocolate cookie crumbs are the main attraction. They turn a simple dessert into a fun treat that everyone loves.
Here’s what you’ll need for your pudding cups masterpiece:
- Cookies: 18-19 oz of regular Oreo cookies (avoid Double Stuff varieties)
- Butter: 6 tablespoons of salted butter, melted
- Dairy Components:
- 3 1/2 cups whole or 2% milk
- 8 oz cream cheese, softened
- 12 oz whipped topping, thawed
- Pudding Mix: 2 boxes (3.4 oz each) of instant French vanilla pudding
- Sweetener: 1 cup powdered sugar
- Optional Decoration: Gummy worms
The secret to this dessert is turning simple ingredients into something amazing. The chocolate cookie crumbs give it a fun “dirt” texture. The pudding cups add a creamy, rich base that holds it all together.
Pro tip: For the best results, make sure all ingredients are at room temperature before mixing. This ensures a smooth, even texture in your dessert.
Kitchen Tools and Equipment Needed
To make the perfect Oreo dirt cake, you’ll need some specific kitchen tools. These tools will make preparing your dessert smooth and fun. You won’t need any fancy or expensive equipment to make this delightful treat.
Start your kitchen adventure by gathering the right utensils for this delicious dessert. Knowing the essential tools will help you make a sweet treat that looks and tastes amazing.
Essential Utensils for Delicious Preparation
- Large mixing bowls (2-3 medium to large sizes)
- Rubber spatula for smooth mixing
- 9×13-inch baking dish
- Electric mixer or whisk
- Sharp kitchen knife
- Cutting board
Precise Measuring Tools
Accuracy is key in easy dessert recipes. Your measuring tools will ensure the perfect balance of ingredients every time.
- Dry measuring cups
- Liquid measuring cups
- Measuring spoons
- Kitchen scale (optional but recommended)
Optional Equipment for Creative Presentations
While not mandatory, these additional tools can elevate your Oreo dirt cake presentation and make it even more exciting.
- Individual serving glasses or mason jars
- Trifle bowl
- Pastry bag for decorative piping
- Cookie crusher or food processor
With these tools, you’ll be well-prepared to create a stunning Oreo dirt cake. It will look as amazing as it tastes. Remember, the right equipment makes preparing easy dessert recipes not just simple, but genuinely enjoyable.
Step-by-Step Preparation Method
Making this easy dessert recipe is easier than you think. The Oreo dirt cake comes together in just a few steps. You’ll have a delicious treat ready in no time.
- Crush the Oreo Cookies
- Use a food processor or place cookies in a sealed bag
- Crush until you have fine crumbs
- Separate about 1-1/3 cups for the base layer
- Prepare the Cream Mixture
- Blend cream cheese with powdered sugar
- Fold in Cool Whip gently
- Ensure a smooth, creamy consistency
- Make the Pudding Layer
- Whisk 2 packages of vanilla instant pudding
- Use 3 ½ cups of cold milk
- Mix until thick and creamy
The key to a perfect Oreo dirt cake is layering. Alternate between crushed Oreos, pudding mixture, and cream cheese layers. Aim for at least 3 layers for a visually appealing and delicious dessert.
| Layer | Ingredient | Quantity |
|---|---|---|
| Base | Crushed Oreos | 1-1/3 cups |
| Cream Layer | Cream Cheese Mixture | 8 oz |
| Pudding Layer | Vanilla Pudding | 2 packages (3.4 oz each) |
Once layered, refrigerate your Oreo dirt cake for at least 3 hours or overnight. This chilling time allows the flavors to meld and the texture to set perfectly. Pro tip: For the best results, prepare your dirt cake no more than a day ahead of serving to prevent the cookies from becoming too soft.
Creative Serving Presentations
Turn your Oreo dirt cake into stunning party food ideas that will impress your guests! Pudding cups are perfect for making this classic dessert both tasty and beautiful. Whether it’s a birthday party, family gathering, or casual get-together, these creative serving suggestions will make your dessert stand out.
Individual Dirt Cups
Personal pudding cups are a hit for parties. Use clear plastic or glass containers to show off the layers. These single-serve treats let guests enjoy their own portion without the mess.
- Use 9-ounce clear plastic cups
- Layer carefully for visual appeal
- Top with gummy worms for extra fun
- Perfect for children’s parties
Trifle Bowl Display
A large glass trifle bowl makes your Oreo dirt cake a stunning centerpiece. Strategically layer the ingredients to create a stunning visual gradient that will impress your guests. This presentation is great for larger gatherings and sophisticated dinner parties.
Flower Pot Arrangements
Serve your dessert in clean terracotta flower pots for a whimsical twist. This playful presentation is perfect for garden-themed events or summer celebrations. Add mint leaves or artificial flowers to complete the garden look.
- Use small, food-safe flower pots
- Clean thoroughly before use
- Add decorative “planted” elements
- Great for themed parties
Tips for Perfect Oreo Crumb Texture
Making the perfect chocolate cookie crumbs is an art. It can take your dirt cake from good to amazing. The texture of your Oreo crumbs is key to getting that “dirt-like” look and feel everyone loves.
There are a few ways to get the right consistency for your chocolate cookie crumbs:
- Food Processor Method: Pulse Oreo cookies in short bursts to create uniform crumbs
- Rolling Pin Technique: Place cookies in a sealed bag and crush for a more rustic texture
- Hand Crumbling: Break cookies manually for varied chunk sizes
Pro tip: Keep some larger cookie chunks to maintain an authentic “dirt” appearance. The goal is to mix fine crumbs with small, crunchy pieces for texture.
“The secret to a perfect dirt cake is in the crumbs – not too fine, not too chunky!”
Your aim is to make chocolate cookie crumbs that are:
- Mostly fine and uniform
- Sprinkled with occasional larger cookie pieces
- Dry enough to maintain crunchiness
Moisture can make your crumbs soggy. To avoid this, add layers carefully and don’t over-mix your dirt cake.
Try different crushing methods to find your favorite chocolate cookie crumbs texture. Each method will give your dirt cake a special touch!
Variations and Customizations
Making a kid-friendly recipe like Oreo dirt cake is fun and easy. You can surprise your family or add a new twist to this classic dessert. These variations will inspire you.
Exciting Pudding Flavor Combinations
Try new pudding flavors to change up your Oreo dirt cake. Here are some tasty options:
- Chocolate pudding for a rich, decadent taste
- Cheesecake pudding for a tangy twist
- Vanilla pudding for a lighter flavor profile
- Butterscotch pudding for a caramel-like sweetness
Seasonal Decorating Ideas
Make your Oreo dessert festive with these creative decoration suggestions:
- Halloween: Add candy pumpkins and orange sprinkles
- Easter: Use pastel-colored candies and chocolate eggs
- Christmas: Sprinkle crushed peppermint and green sugar crystals
- Summer: Decorate with colorful gummy worms and beach-themed toppers
Dietary Modifications
Everyone can enjoy this kid-friendly recipe with these adaptations:
- Gluten-free: Use gluten-free sandwich cookies
- Dairy-free: Substitute milk with almond or oat milk
- Low-sugar: Use sugar-free pudding mix
- Vegan: Replace dairy ingredients with plant-based alternatives
Pro tip: Always taste-test when making changes. This way, you can make sure the flavors and textures are still great. Your creativity can turn this classic Oreo dessert into a personalized treat that everyone will love!
Storage and Make-Ahead Instructions
Preparing no-bake treats like Oreo dirt cake in advance is a game-changer for busy home bakers. This delightful dessert offers incredible flexibility for meal planning and entertaining.
When it comes to storing your no-bake treats, follow these essential guidelines to maintain optimal taste and texture:
- Refrigerate the dirt cake within 2 hours of preparation
- Store in an airtight container to prevent moisture absorption
- Keep refrigerated at 40°F or below
Pro tip: Always cover the dirt cake tightly with plastic wrap or a lid to prevent absorption of other refrigerator odors.
| Storage Detail | Recommendation |
|---|---|
| Maximum Storage Time | 3-4 days |
| Optimal Flavor Blending Time | 8-12 hours |
| Best Prepared | 1 day before serving |
“The secret to perfect no-bake treats is smart preparation and proper storage!” – Dessert Enthusiasts
To prevent soggy cookies, assemble the layers just before serving. If preparing in advance, keep the Oreo crumbs and pudding mixture separate until ready to serve. This technique ensures each bite maintains its delightful crunch.
For those planning ahead, you can confidently make your Oreo dirt cake up to 24 hours in advance. Simply store it in the refrigerator, covered, and enjoy the convenience of this make-ahead dessert.
Nutritional Information and Serving Size
Enjoying your homemade oreo dirt cake? Knowing its nutritional info is key. A serving has about 256 calories. It’s a treat best savored in small amounts.
The nutritional breakdown is as follows:
- Calories: 256 per serving
- Carbohydrates: 34g
- Protein: 3g
- Fat: 12g
How much you eat matters. A standard serving is 1/2 cup. It’s enough to satisfy your sweet tooth without overdoing it. If you’re watching your diet, try these tips:
- Use low-fat cream cheese
- Substitute some Oreo cookies with lighter alternatives
- Reduce sugar by using sugar-free pudding mix
Pro tip: Oreo dirt cake can fit into many diets if eaten wisely. Its creamy texture and rich taste make it a delightful treat now and then.
But remember, it’s not a health food. Enjoy it with fresh fruits or a light drink to balance the indulgence.
Conclusion
Creating the ultimate oreo dirt cake is more than a recipe. It’s a journey that brings joy to any event. These easy desserts turn simple ingredients into a treat that sparks memories.
Whether it’s for a birthday, family reunion, or a sweet craving, this recipe is perfect. It’s versatile and delicious. You can change it up with different flavors, decorations, or presentations to surprise your guests.
Be your own dessert artist and try new things. Each time, you’ll find new ways to make it your own. You can make it in flower pots or individual cups. Your oreo dirt cake is a canvas for your creativity.
So, get your ingredients ready and let your creativity shine. Impress everyone with a dessert that’s fun to make and eat. Your oreo dirt cake adventure begins now!
FAQ
What is Oreo dirt cake?
Oreo dirt cake is a no-bake dessert that looks like dirt. It’s made with crushed Oreo cookies and creamy pudding. Decorated with gummy worms, it’s a hit at parties.
How long does it take to prepare Oreo dirt cake?
It’s quick to make, taking 15-20 minutes to prepare. Then, it chills in the fridge for 1-2 hours to set.
Can I make Oreo dirt cake ahead of time?
Yes, it’s perfect for making ahead. You can prepare it up to 24 hours in advance. Just keep it covered to stay fresh.
Are there any variations for dietary restrictions?
Yes, you can make it for different diets. Use gluten-free cookies, dairy-free pudding, and non-dairy whipped topping for various needs.
What are some creative ways to serve Oreo dirt cake?
Serve it in individual cups, a trifle bowl, or even flower pots for a garden look. Add chocolate rocks or candy flowers for extra festivity.
How do I keep the Oreo crumbs from getting soggy?
Layer the crumbs carefully and avoid overmixing. Add them just before serving or use a method that keeps them separate from the creamy layers.
Can I freeze Oreo dirt cake?
Freeze it for up to 2 weeks. Wrap it tightly in plastic wrap and store in an airtight container. Thaw overnight in the fridge before serving.
What are some popular flavor variations?
Try chocolate, cheesecake, or vanilla pudding flavors. Use flavored Oreo cookies like mint or peanut butter for unique tastes.
Is Oreo dirt cake kid-friendly?
Absolutely! Kids love it because of the gummy worms and fun presentation. They can even help make it.
What equipment do I need to make Oreo dirt cake?
You’ll need mixing bowls, a whisk or mixer, and serving dishes. A food processor or rolling pin can crush cookies. No special baking equipment is needed.
What is your rating for the recipe?
Categories and tags of the game : after_paragraph, Baking Recipes, Bicycle, Climbing, Crash, Creole cooking